Draw the projections of a straight line AB, of 50 mm length for the following positions: (i) Parallel to & 20 mm above HP & on VP. (ii) Parallel to both HP & VP & 20 mm from each. (iii) Perpendicular to HP, in the VP and its one end is 15 mm above the HP. (iv) Perpendicular to VP, in the HP and its one end is15 mm in front of the VP.
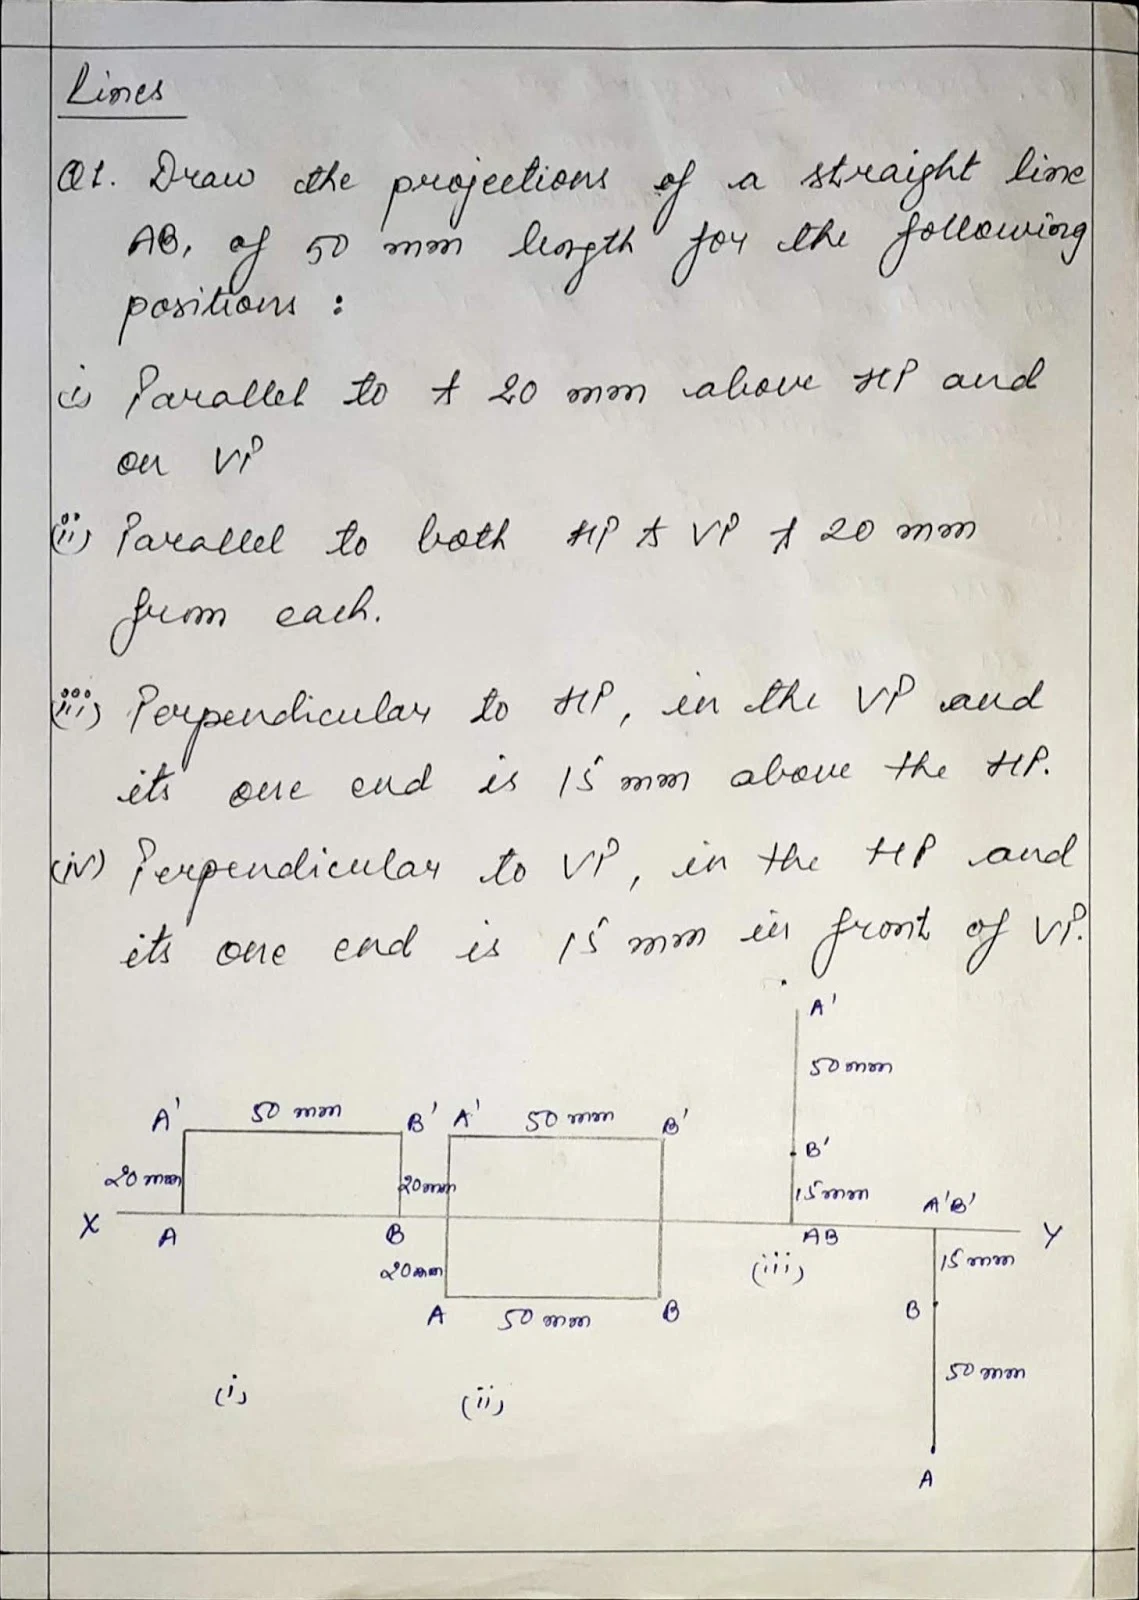
Draw the projections of a straight line AB, of 50 mm length for the following positions: (i) Parallel to & 20 mm above HP & on VP. (ii) Parallel to both HP & VP & 20 mm from each. (iii) Perpendicular to HP, in the VP and its one end is 15 mm above the HP. (iv) Perpendicular to VP, in the HP and its one end is15 mm in front of the VP.

Getting Info...

About the Author

"Meet Mr. Akhand Dutta, the visionary Founder and Owner of CEWA (Civil Engineering With Akhand Dutta). Currently, The Placement Coordinator for Structural Engineering at the prestigious National Institute of Technology, Kurukshetra. With a lif…

Post a Comment

Oops!
It seems there is something wrong with your internet connection. Please connect to the internet and start browsing again.
AdBlock Detected!
We have detected that you are using adblocking plugin in your browser.
The revenue we earn by the advertisements is used to manage this website, we request you to whitelist our website in your adblocking plugin.
Site is Blocked
Sorry! This site is not available in your country.